shark vacuum cleaner replacement cord

HomeBlogHow To Replace A Damaged Cord On Your Vacuum? How To Replace A Damaged Cord On Your Vacuum? Replace the cord on your vacuum as soon as you find it has any damage or problems. As a vacuum user, you will sometime run into the situation that the power cord on the machine gets in the way of its head. In this case, any tiny cuts will probably damage the plastic coating surrounding the electrical wires. Do not continue running the machine with exposed, bare wires. Although different models have different power cords, they are all connected to the motor in the same way. Removing the motor housing takes more time than replacing the vacuum cord. So if you choose to replace the cord, ensure that the new cord is in the same weight as the old one and follow the below advice for the best result possible. Take out the old cordPut it on a table for easier access. Have a towel ready for placing parts of the vacuum on as you remove them. Remember to put the parts in order for easier reassembling later

Move the brush roller to the bottom of the unit. Find the screws which hold the roller in its place and take them out. Remove the belt of the brush and pull the brush out. Place the screws that keep the filter in place behind the brush in the correct order
henry vacuum cleaner models Untie the screws that hold the motor housing in place.
genesis vacuum cleaner instruction manualsIn some models, you may also have to unfasten the handles so that the housing can come off the machine.
steam vacuum cleaner hooverPay attention to the wiring’s orientation on the motor. The white wire on the power cord should go with the motor. Two colored wires should connect to the other wire Screw counterclockwise to join the nuts which hold the wires of the cord and motor.

Put the wires into their correct groups. If the white wire includes a terminal connection fitting into the motor, connect the fastener and drag that connection out of the motor of the unit. Divide the terminal’s prongs with a knife and drag the wire free Calculate the distance from the cord ending to the strain release. Undo the screws holding the strain release and the cord retainer. These two parts work together to make sure that you will never twitch the cord out of the motor during the vacuuming process Install the new cord Put both the strain relief and cord retainer at the end of the new power cord in place of the old cord. Use a knife to release about 1/2 inch of wire detachment and casing on the black and white wire of the new power cord. Be careful or you will cut the wires Put the white wires back to the terminal. Fold the terminal, using a pair of needle-nose pliers. Drag the terminal back into the motor. If the motor and the white wires connect together with nuts, join them

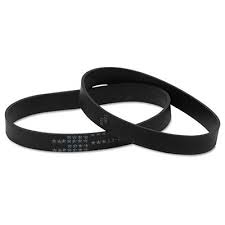
Connect the colored wires. Tie the wire nut you took out before Assemble the the cord retainer and strain relief tool using screws. Again, pay attention to the new cord position to make sure that it is in the same position as the old oneReinstall the motor housing. Put the filter back in position and refasten it. Put the belt back in its original position and reconnect it to the brush. Place the housing back over the brush and keep it in place with screws Now you have the new cord replaced in your vacuum! For easier and proper reassemble later, take photos as you disassemble the machine and remove the wiring Take care that the new cord is long enough so you can vacuum the whole room without having to switch outlets If you assemble the brush and find some signs of wear on the belt, it’s wise to replace it If you notice that the cord wiring includes soldering for holding the wires together, it’s highly recommended to have a repair person replace the cord unless you can confidently solder
If you are prepared to be methodical and want to save some cash, replacing a broken cord is not rocket science. We hope you found this brief guide useful and do not hesitate to contact us if you have any queries. Replacement Oreck White 30 ft CordDetailsFor ORECK XL Vacuums BEST Roller (BRUSH ROLL + 6 BELTS) FREE Shipping on orders over $49. 14.2 x 4.1 x 2.7 inches #69,934 in Home Improvements (See top 100) #534 in Home Improvement > Electrical > Cords, Adapters & Multi-Outlets > Extension Cords #783 in Home & Kitchen > Vacuums & Floor Care > Vacuum Parts & Accessories > Bags See all 92 customer reviews Bill M., San Diego, CA See all 92 customer reviews (newest first)Saved lots of $$ not buying from local Oreck Store. I replaced my cord for an original OreckXL and it fit perfectly. Worked perfect on our oreck's. Only negative is that the cords are white, when the oreck's are blue..so they stand out a little. Wish they were grey at least.
NOT WHAT I WANTEDThe insulation is a bit thicker than the old one (To be expected honestly) with some oomph it works like a charm. I ordered this in April of 2015 and it installed rather easily, but here I am in March 2016 and the insulation around the cord has already split and apparently worn through as the... It didn't say anything in the write up, but you have to buy electrical contacts to replace the cord. Exactly what I need and easy to install. used this with my shark navigator pro that my dog chewed the cord too. Prime Wire & Cable EC883627 35-Foot 16/3 SJTW Patio and Deck Extension Cord, White Oreck Cord, 30' 4140 with Grommet Black Aurum Cables 25 Feet 3 Outlet Extension Cord 16AWG Indoor/Outdoor Use - White - UL Listed For ORECK XL Vacuums BEST Roller (BRUSH ROLL + 6 BELTS)Replace a damaged cord on your vacuum cleaner as soon as you notice it has problems. A vacuum cleaner's power cord sometimes gets in the way of its head. When that happens, tiny cuts can damage the plastic coating that surrounds the electrical wires.

Never operate a vacuum with exposed, bare wires. While each brand of vacuum has a slightly different power cord, all cords are wired into the motor in the same basic fashion. It often takes longer to remove the vacuum’s motor housing than it does to replace the vacuum cord. As you replace the old cord, make sure the new cord is the same weight as the old. Unplug the vacuum from the electrical source. Place the vacuum on a work table to make it easier to work on. Set an old towel on the table so you can place parts from the vacuum as you remove them. Keep the parts in order so they are easier to reassemble. Expose the brush roller on the bottom of the vacuum. Locate the screws that hold the housing that holds the roller in place and remove them. Disengage the brush’s belt and pull out the brush. Remove the screws that hold the filter in place behind the brush assembly. Unfasten the screws holding the motor housing in place. You may have to release the handles for the housing to come off the machine on some models.

Take note of the orientation of the wiring on the motor. A white wire from the power cord should connect with a white wire on the motor. A pair of colored wires should join on the other wire. Twist the wire nuts holding the wires of the cord and motor together counterclockwise to release the nuts. If the white wire has a terminal connection that fits into the motor, pinch the fastener together with a pair of needle nose pliers and pull the terminal connection straight out of the vacuum’s motor. Separate the prongs of the terminal with a knife to pull the wire free. Measure the distance between the end of the cord and the strain release. Release the screws holding the cord’s strain relief and cord retainer to the vacuum’s body. These two function together to keep you from accidentally pulling the cord out of the motor as you operate the vacuum. Pull the old cord off the vacuum and pull the strain relief and cord retainer from the cord as well. Slide the cord retainer and strain relief onto the end of the new power cord.
Place them in the same relative location as the old power cord. Measure to ensure you have the same amount of cord between the strain relief and the motor. Do not fasten them in place at this time. Strip 1/2 inch of wire insulation and casing from both the black and white wire on the new power cord using a sharp knife. Do not cut the wires. Slide the white wires on the cord back into the terminal. Crimp the terminal closed with a pair of needle-nose pliers. Push the terminal back into the motor. Alternatively, if the motor connects the white wires with wire nuts, attach them. Twist the ends of the colored wires from the motor and the cord together. Twist a wire nut you removed earlier clockwise over their ends to secure them together. Fasten the cord retainer and strain relief device to the vacuum’s body with screws. Take care to keep the new cord in the same position as the original cord. Put the handles back onto the vacuum. Reattach the motor housing. Slide the filter back into position and reattach it.