vacuum cleaner coke

We already know that vinegar is a great weapon for fighting carpet stains, but adding a little baking soda can take it to another level. Household blog One Good Thing by Jillee suggests soaking the stain with vinegar, then sprinkling in a little bit of baking soda. The order is important here; pour vinegar on a pile of baking soda, and you have the makings of a carpet volcano. Once you have a bubbling mound of baking soda on the floor, just wait a few moments for it to absorb the stain, then wipe and vacuum it up. Jillee used this mixture to clean up pet urine, but it should work on a variety of stains, so hit up the source link for some more photos of this hack in action. How to Get Rid of Pet Stains on Carpet | One Good Thing by JilleeYour keyboard is one of your most important peripherals, but it’s bound to get clogged with dirt and grime over time. Dust off, scrub down, and clean up your number one input device safely with these tips. There are plenty of ways to clean depending on what afflicts your workspace.

We’ll break it down by type, but first thing’s first: unplug your keyboard!
vacuum cleaner leaves dirtSome of these cleaning methods can theoretically do some damage to your keyboard if there’s power going to it, so be sure it’s unplugged and the batteries are taken out.
mini vacuum cleaner for computer philippines A common problem in offices, dust can really make typing unpleasant.
metro vacuum cleaner bagsIt’s an easy fix, however. For daily maintenance, you can use a small soft-bristled dusting brush, like the one below. A small hand-held vacuum cleaner or a can of compressed air will work well. For more caked on dust, try the brush/hose attachment of a larger vacuum cleaner to help scrape off dust bunnies.

Daily use can breed a whole different kind of filth on your precious keys. Be wary of disinfectant sprays; many are strong enough that you wouldn’t want to keep your hands in contact with them for very long. Try to find ones that are electronics-friendly. Personally, my favorite option is to use an isopropyl alcohol solution. Be sure to use isopropyl and NOT ethyl, as the harsher ethyl alcohol can take the lettering off of the keys. Anything about 60% alcohol or more is fine; higher concentrations don’t really help kill more germs, but it also won’t hurt. Take a little alcohol solution and moisten an old rag or a paper towel with it. Do NOT pour it into the keyboard. Trust me, a wet napkin is enough. Scrub it over the tops of the keys, and use a wet cotton swab to go down in between them. What’s worse than accidentally turning on Sticky Keys? Spilling your soda and getting real sticky keys. First thing’s first, unplug your keyboard. Dump out any excess liquid and mop up as best you can with paper towels.

While it’s best to clean while the keyboard is still wet to minimize the stickiness, the process is much the same whether you spilled your soda 30 seconds ago or 30 days ago. To get rid of sticky keys, we’ll need to pop off the keys and clean the keyboard more thoroughly. If you have a standard keyboard, you’ll be able to find references to where all the keys should go if you don’t already have the layout memorized. For custom keyboard, it might be helpful to draw a quick map or take a picture with your digital camera so you know where everything belongs when you go to put things back together. For desktop keyboards, take a butter knife or a screwdriver and try to pry up one corner of the keys. You don’t need to use a lot of force; you should feel a pop and the key will come right off. For laptop keyboards, your fingernail should be enough to pull the plastic up. Start with one corner and move to an adjacent one. Be extra careful, since the mechanism is made of plastic and you don’t want to break it.
Once the keys are off, you can better use a paper towel and maybe some alcohol solution to clean the keyboard base. Careful with those metal bars! To clean the keys you can wash them in warm water and/or use some cotton swabs. To put the keys back on, just place them over their correct position and press them until you hear a snap. They shouldn’t feel mushy or sticky anymore, and if they do it’s probably because they either didn’t set properly in the base or it’s in the wrong place. With keys that have metal bars, make sure the bars are properly attached to the keys and that the ends line up in the slots on the keyboard (compare the above and below images). Chiclet-style keyboards are great because they prevent a lot of dirt from getting underneath, but unfortunately I’ve still not found a good way to clean them of sticky spills. If you know of a good way, share it in the comments! Geeks’ diets aren’t always the best. Aside from spilled soda, you may find potato chip grease, Cheeto crumbs, or popcorn pieces stuck under the keys, making them feel mushy while typing.
As with liquid cleanup, pop off the keys as best you can. Take a vacuum, then a can of compressed air to really flush out everything underneath. For really grimy spots, try using a pencil eraser. You might be surprised as how well the rubber will peel off dirt. Just be careful that the eraser-dust doesn’t fall back in the keyboard. If you’ve tried everything to cut the dirt and grease, then I’ve got one last method for you. Take a soft-bristled toothbrush that’s wet with a bit of alcohol to your keyboard. You can clean the removed keys with a toothbrush and some soapy water. Your keys will be looking brand-new in no time! A dirty keyboard hinders typing, is riddled with disease-inducing germs, and just doesn’t go well with the decor. Show your keyboard some love by cleaning it. These methods also work well with all different kinds of mice, especially he alcohol and cotton swabs. Have a better way to do it? Share in the comments!Seeing as how we spend almost 1/3 of our entire life lying horizontally on a mattress – one would think it would stand alone atop of our list of regular cleaning duties..

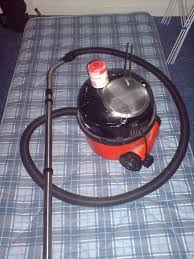
but lets face it, we rarely think about cleaning the mattress. The problem is, once you strip away all the sheets, you’re left with a mattress that has a cover that you can’t remove – it’s not like there’s a zipper and you can simply unzip the cover and throw it into the washing machine – no, the sad truth is – once we pull all the sheets off, we tend to turn a blind eye to whatever nastiness might live atop the mattress itself. Mattresses can harbor spills, stains, dirt, dust, dust mites and worse – so, maintaining a clean mattress is important for several reasons, not the least of which is the fact that your partially clothed body is lying on top of it with only a sheet separating you. This is an important step because it removes the dust, dead skin cells and other debris that lands on your mattress and which accumulates, en masse, over time. Consider doing this every time you rotate your mattress; Now, the important part here is to use a clean upholstery attachment, because remember that your vacuum sucks up all kinds of nasties and you don’t want to be depositing those on your mattress.

We have a post and video on how to clean your cleaning tools, which teaches you how to do this. Remember to vacuum the mattress as well as the foundation, if you can manage it. You can fancify your mattress vacuuming by adding another step, and that is deodorizing. I guess with all that sweat, dust and other fun stuff your mattress handles, it can start to develop it’s own unique aroma. To combat this, simply sift baking soda over your mattress, leave for thirty minutes and then vacuum up with that upholstery attachment. Baking soda is a natural deodorizer so it will definitely help neutralize any odours. Note however, that it won’t really clean any stains in this ‘dry’ cleaning method. If you like essential oils, add five drops to the baking soda pre-sift and you’ll get to enjoy that lovely scent for a few nights thereafter. Stains come in 3 varieties (protein, tannin and grease), but only one usually ends up on your mattress – and that would be a protein stain – and the reason we’re only going to cover protein stains here is because blood, sweat, vomit, urine and other bodily liquids are what we usually have to contend with on a mattress.
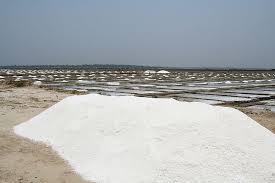
As with any stain, it’s best to tend to it as soon as possible to avoid the stain setting in. Liquid stains need to be blotted up first with a cool, wet cloth and then excess moisture blotted up with a dry cloth. Remember to use a a pressing motion, rather than a circular motion to lift the stain to avoid further rubbing the stain in. Also remember that heat sets protein stains so only use cold water when handling these. Fresh protein stains can usually be removed with a mixture of salt, baking soda and water. Create a paste, rub it on the area and brush off 30 minutes later. Then, use some cool water on a damp cloth to remove the excess and allow to dry. If that doesn’t work, upgrade your solution and try my favourite homemade stain remover, consisting of 2 parts hydrogen peroxide to one part dish soap. Gently apply the stain remover to the area, gently brush in with a cleaning toothbrush and wipe up five minutes later with a cool, damp cloth. This should also help with any unsightly discolouration.

Some people love using enzyme cleaners to remove protein stains, and you are welcome to try this, they are highly effective. Just remember to use as little liquid as possible and to ensure your mattress is completely dried before using it again to avoid growing your very own mold spores. Placing fans in the room can speed up the process. Some folks swear by deep cleaning or steam cleaning their mattresses. Now, what I know is that mattresses don’t do well with moisture so I don’t use these methods, although I have access to both a deep cleaner and a steam cleaner. I also know that there are professional service providers who do this and those with allergies or very difficult mattress stains can consider using a professional rather than hacking it on their own. These folks are trained and have access to great extraction equipment. I’d trust them over me, particularly when it comes to my most beloved and crucial sleeping tool. Turn and/or flip your mattress so it will wear evenly, do this at the turn of every season and rotate clockwise.

My husband and I have about 100 lbs difference between us, so rotating the mattress means we prolong the life of the mattress and even out the wear. It takes a grand total of 45 seconds to do. No water on your mattress – mattresses really don’t like water, and memory foam mattresses can’t actually handle liquids at all. With memory foam or Tempurpedic mattresses, liquid gets trapped in the cellular structure and has nowhere to go. On that note, never, ever get your memory foam mattress wet. If you need to spot clean, be super stingy with the liquid and blot like a mad man or woman. Use fans to dry the mattress so if that mattress gets wet, use fans to assist in dry time and if you have access to a wet dry vac, use that to help extract moisture. Don’t think about sleeping on mattresses until they are completely dry. We’ve been asked about how to deal with bedbugs. This is a serious issue and should not be a DIY project. Act fast and call a professional.

Have them treat your mattress, room and any other affected areas of the house immediately. If you get – them you want them gone, and these guys know how to do it. Now you may recall at the beginning of this video that I mentioned something about a tip which would save your mattress from spills and stains and the like – well, its not really a huge secret but a mattress protector is one of the best investments for your mattress – there are a few different types, which I have linked below if you are interested in learning more. Luna Premium Hypoallergenic Waterproof Mattress Protector Sleep Defense System – Waterproof / Bed Bug Proof Mattress Encasement Sleep Tite by Malouf ENCASE Mattress Protector – Six-Sided Zipper Encasement But trust me on this one, it’s much easier to take off a mattress protector and throw it in the washing machine then to fiddle around on your mattress trying to remove tough stains or spills. Also it’s important to note that many mattress manufacturers strongly recommend using a mattress protector – because stains on your mattress will void your warranty.